| Status | ||||
|---|---|---|---|---|
|
...
| Note |
|---|
This tutorial works with Azure AD. For Azure AD B2C the configuration differs in several areas. Azure AD B2C does not offer features to include group membership in a token issued for user flow. Custom Code is required for this. See details on this limitation here: https://mrochon.azurewebsites.net/2019/05/06/using-groups-in-azure-ad-b2c/Search for “using groups in azure ad b2c”. |
Prerequisites
To configure Azure AD integration with Picturepark, you need the following items:
...
In Settings > IdP Setup > Create a new Identity Provider
Name: Choose a name, used internally and for you to see at first glance what it is
Display name: name is shown to the users on login e.g. Company Access
Type: ADFS, Azure AD, Other
For Azure select Azure AD
Protocol: Open ID Connect
The protocol for all authentication in Picturepark is Open ID Connect.
URL
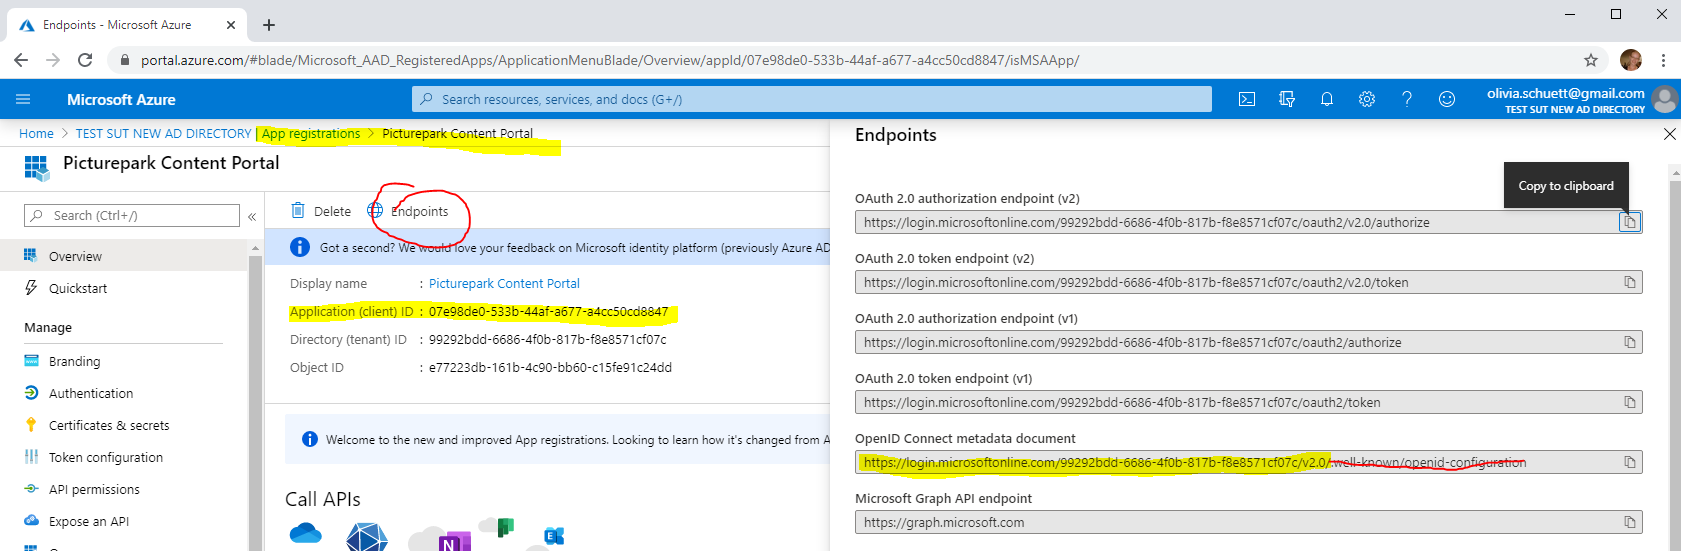
The Endpoint for OpenID, remove everything after V2.0
Example: https://login.microsoftonline.com/99292bdd-6686-4f0b-817b-f8e8571cf07c/v2.0 (you will need to enter a dummy URL until you have the client id of the application from Azure after the next step regarding what needs to be done in Azure Portal).
You find that in Azure Active Directory > Overview - Endpoints > Open ID Connect
Client ID: The Application (client) ID once you have set this up for now enter a dummy id.
Client Secret: Open Manage > Certificates & Secrets
Sort order does not need to be filled out it will be created automatically. If you have multiple IdPs and wish to display them in a certain order you can however add a number here eg. 0,1, 2, 3 etc.
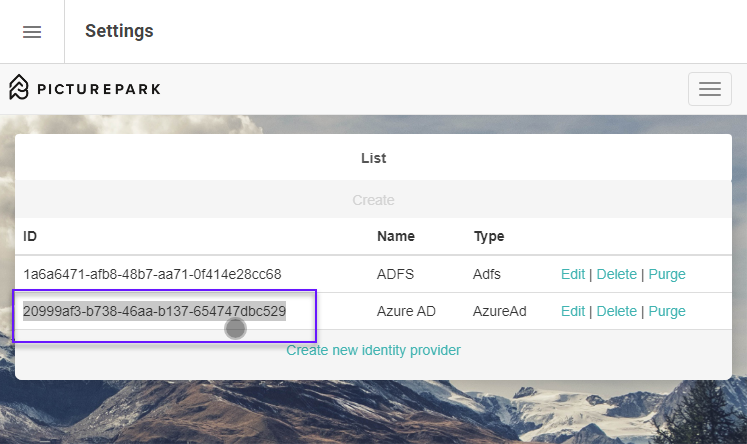
Click on create and then copy the following Id you will need it when setting up the Azure portal.

In Azure Portal
Create an Azure Active Directory
Check Microsoft How To Create Active Directory Tenant Guide.
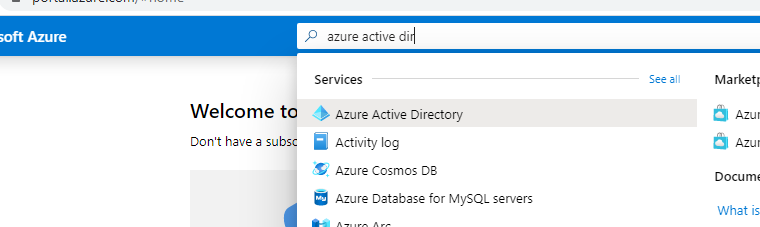
Create a new Azure directory if you don't have one already by going to https://portal.azure.com/ and then clicking on Azure Active directory and create a tenant.
Select a directory type. We are selecting the Azure Active Directory in this tutorial.
Click on Next
Enter your organization name, initial domain name, and country/region and click on next
Add Users and Groups to Azure Active Directory
Manage > Groups
New Group (default is security)
Name: Admin
New Group
Name: Editor
Manage > Users
Invite a test user or use an existing AD user and add them to your admin group. Your users must have their email filled out as this is required by Picturepark.
Tutorials on Microsoft:
Register Picturepark as App
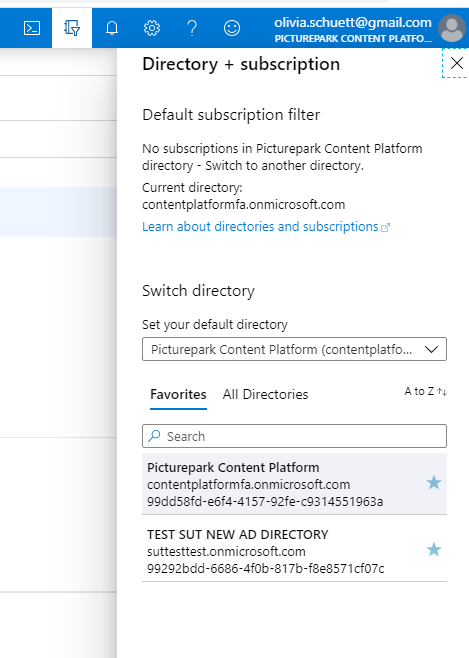
In the Azure portal, ensure that you have the correct directory selected. Click the icon in the upper right bar to switch directories.
Open Azure Active Directory either from the directory or from the Azure Portal directly.
In the left navigation panel, click "App registrations" and add a new registration
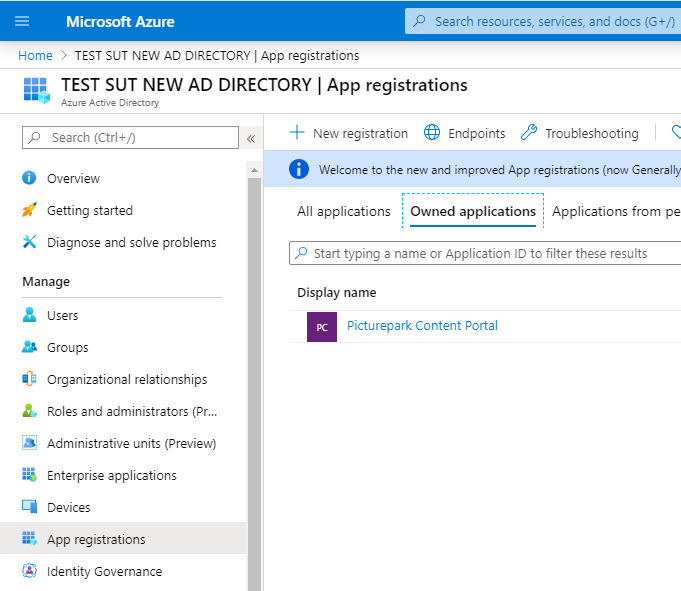
Give it a name e.g. Picturepark Content Portal
Select which account types should have access (single-tenant only allows from the currently selected directory)
Redirect URI: URL to the identity server for your Picturepark platform e.g. https://ids-cp-ch.picturepark.com/ (check in your Picturepark > Settings > Help > System Information.
The newly registered app will directly open and your breadcrumb should look something like this:
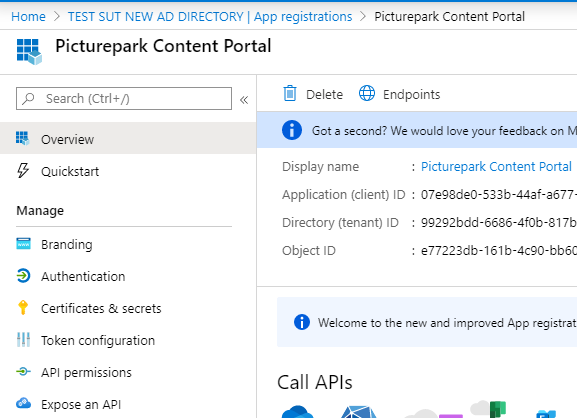
Configure the Picturepark App
Select Manage > Authentication
Add Redirect URLs for your Picturepark
Code Block https://ids-cp-ch.picturepark.com/signin-<idpid> (e.g.https://ids-cp-ch.picturepark.com/signin-bb09dece-aeb5-47fb-8be5-30504e2ba9dc)The ID is the one from Picturepark when creating a new Identity Provider.
Add a Logout URL if you would like one. This is optional and is not required for authentication to work. It is a convenience if users are logging out of the Azure AD, this will then log them out of picturepark IDS and within 10 minutes at the latest Picturepark itself.
Code Block https://ids-cp-ch.picturepark.com/signout-<idpid> (e.g.https://ids-cp-ch.picturepark.com/signout-bb09dece-aeb5-47fb-8be5-30504e2ba9dc)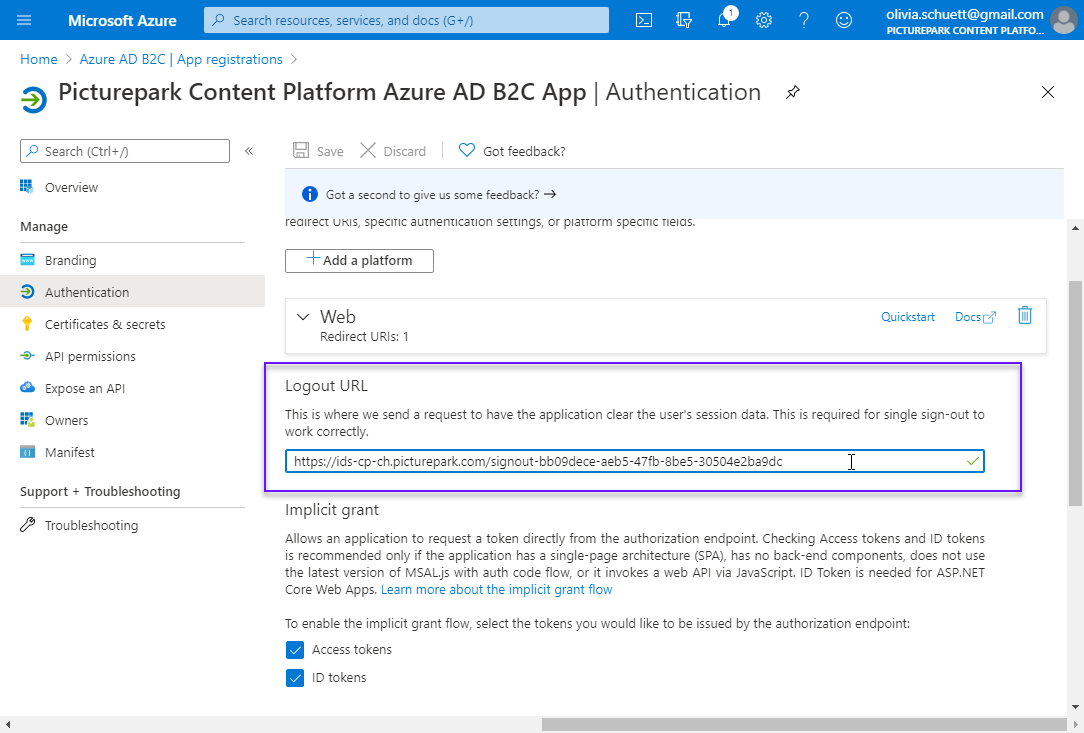
Implicit grant
Leave this empty, don't select anything.
Picturepark Open ID Connect integration uses code flow, not implicit flow.
Add API Permissions
Add permission
Select Microsoft Graph
Select Delegated permissions
Select and save
email
offline_access
openid
profile
...
Add API Exposure to Client Application
Open Manage > Expose an API
Add a scope
You'll need to set an Application ID URI before you can add permission. (Microsoft chooses one by default but it can be changed). Save and continue
Scope name: user.signin
Who can consent? Admins only
Consent display names: User Authentication
Consent descriptions: User Authentication
Click Add scope
Add a new client application
Client ID is taken from the Overview page
Select Scopes
...
Go to Manage Certificates & Secrets and create a new client secret and copy it.
...
Picturepark does not allow role assignments for federated users. Therefore assignments to roles and groups are required via claim mappings, so-called tokens.
Add Groups to Users
Open Azure AD
Open Users
Add Membership to your users

Add Tokens to the Azure App
Help on Token creation in Azure AD B2C: https://docs.microsoft.com/bs-latn-ba/azure/active-directory-b2c/configure-tokens
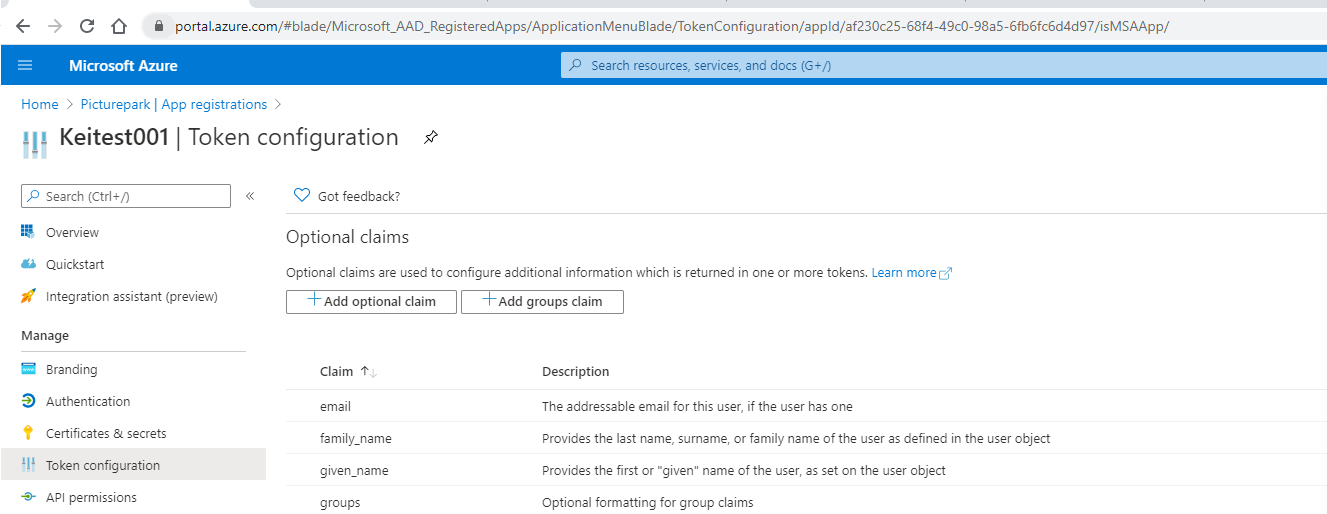
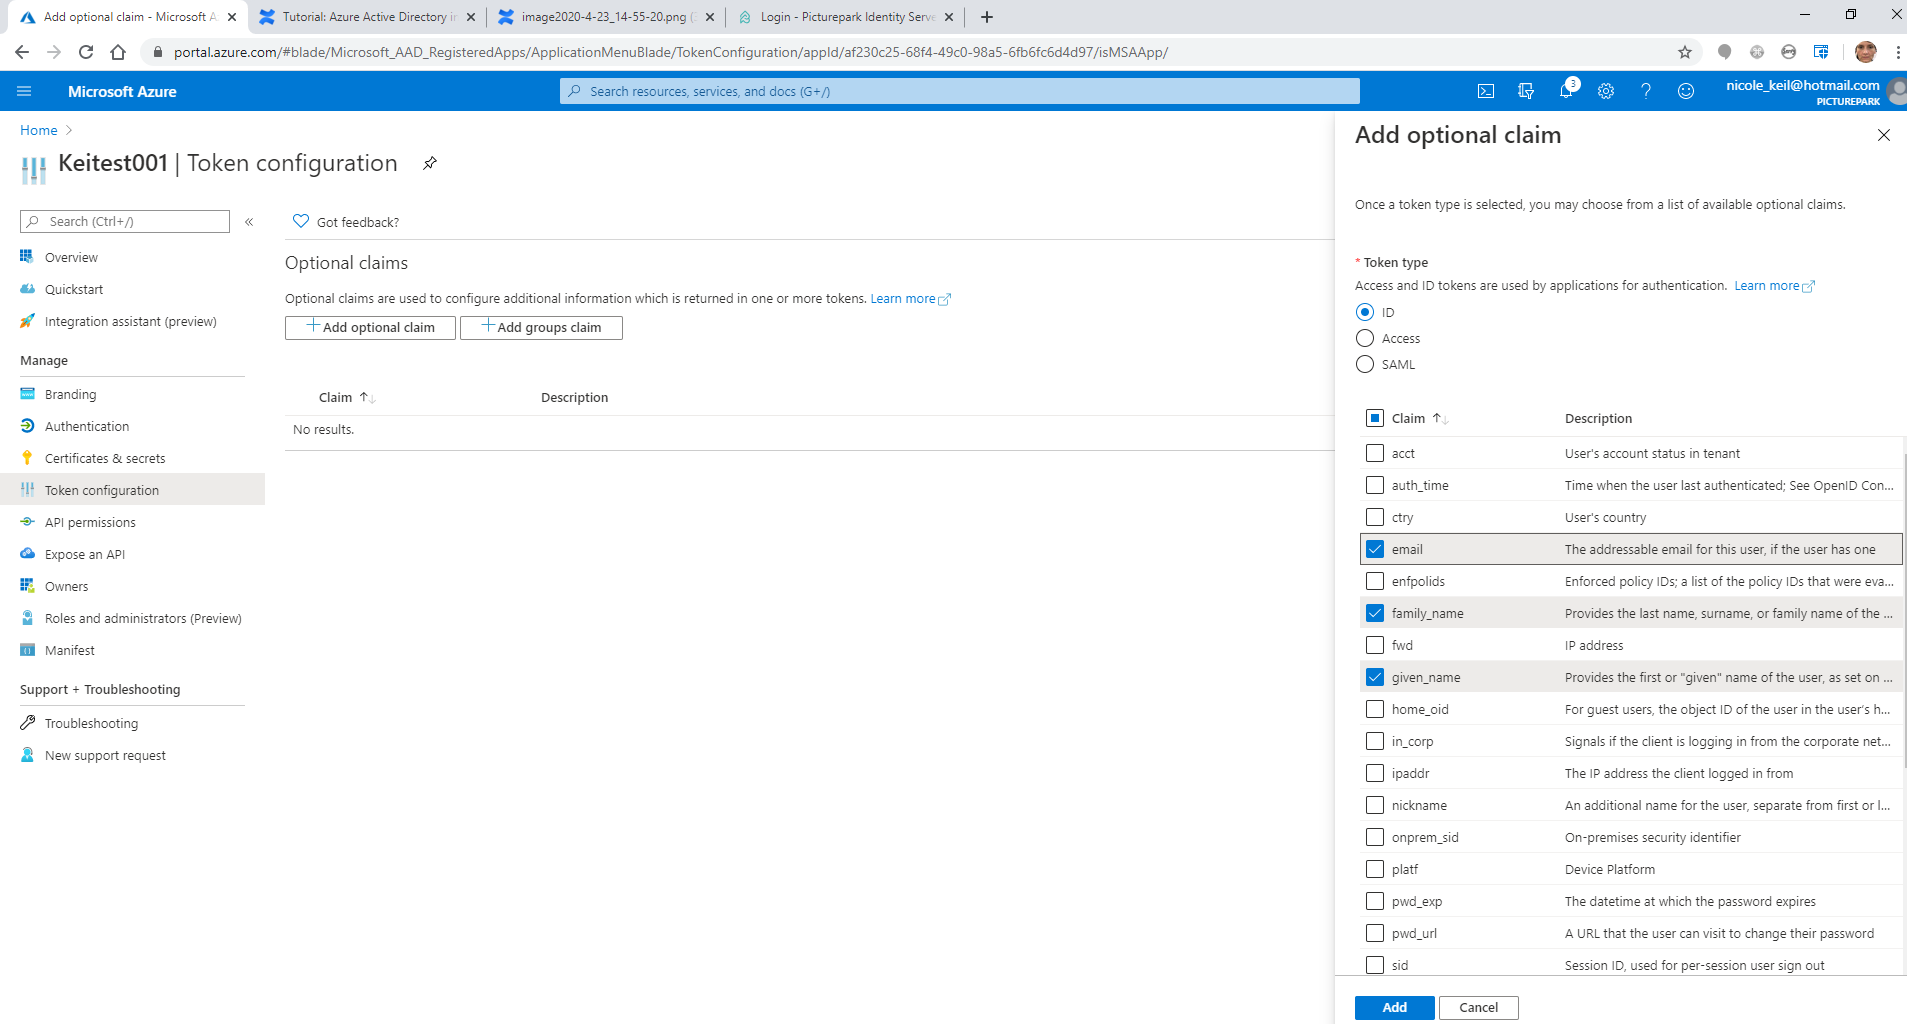
Open Manage > Token Configuration
Add optional claims
You will need to pass the email address claim to Picturepark as it is required.
We also recommend the family name and given name. These three do not need to be mapped in Picturepark as they are automatically added. Other claims will also need to be mapped in Picturepark under Settings/IdP Settings/YourIdp/Group Mapping
Add any group claims in Azure and then map them into Picturepark. The group claim type in Picturepark IdP settings is groups and the group name is the object id of the group.
Get an Overview of your Application
...